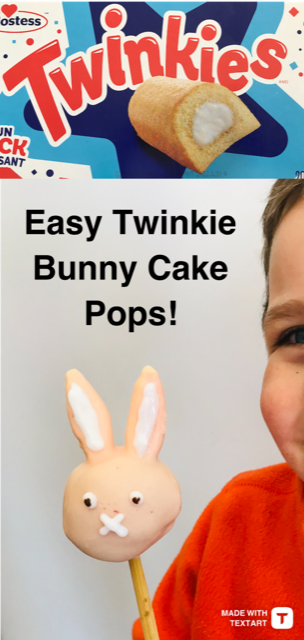
Easy Twinkie Bunny Cake Pops
For all moms who are not fans of baking from scratch, or just don’t have the time or energy…
Cake pops can’t get much easier than throwing soft and delicious Twinkies in your mixer!
1 Twinkie = 1 Cake Pop
So keep that in mind when you get supplies. There were five twinkies in the box I bought.

Generally, I bake a ton from scratch for my dairy-free and egg-free kids, but I also like to live a little and save myself the time whenever possible. Not to mention that this is just so much fun!

Ingredients:
- Twinkies
- Tootsie Roll Candies or Banana Marshmallows for the ears
- White or Regular chocolate chips for coating
- 1/4 tsp olive oil or oil
- icing sugar
- food coloring
- Cake or Lollipop Sticks
Tootsie Roll candies and Banana Marshmallow candies make excellent bunny ears! Just cut them in half, shape them a bit with your fingers and stick them in the top of the cake pop.
If you’re coating them in white chocolate the Banana Marshmallows are the best choice for the ears.
The Tootsie roll candy is dark and makes the ears a little darker, but the Tootsie Rolls would be fantastic for darker cake pops which I certainly intend on making! Joe Louis anyone?!

Let’s make Bunny Cake Pops!
Step-by-Step

Step 1: Tear the Twinkies into chunks and throw them in the mixer. Mix until they come together.

Step 2: Prepare a pan to go into the freezer with a silicon mat, saran wrap or wax paper.
Step 3: Roll about 2 tablespoons of mix into a cake pop, insert cake stick, and place on prepared pan. Repeat with the remaining Twinkie mixture.


Step 4: Cut your Tootsie Roll, or Banana Marshmallow candy in half and shape into bunny ears.

Step 5: Insert the ears into the cake pops.
Step 6: Place the bunnies in the freezer for at least an hour.
Step 7: Place the chocolate chips and oil in a microwave safe bowl or mug. Microwave for 30 seconds and stir. Continue to microwave at 30 second intervals, stirring in between until the chocolate is melted.
Step 8: Remove the cake pops from the freezer and immediately dip them into the melted chocolate.

Step 9: Tap the excess chocolate off by gently tapping the stick on the side of the cup or bowl.

Step 10: Stand the coated cake pop up in a mug or cup until the chocolate hardens. Careful! Make sure you distribute the weight appropriately or they may topple over.
Step 12: Mix your icing sugar with a TINY bit of water in a bowl until you make a fairly thick icing.
Step 13: Use this to give your cake pops a nose, ears, and eyes.
Step 14: Enjoy and SHARE THE LOVE!


Easy Twinkie Bunny Cake Pops
Equipment
- 5 Cake or lollipop sticks
- 1 Piping Bag and small round tip This is used to decorate the eyes, nose and ears
Ingredients
- 1 box Twinkies
- 1 bag Banana Marshmallows or Tootsie Roll Candy
- 1 cup White Chocolate Chips
- Red food coloring Optional
- 1/4 tsp Olive oil or other oil
- 1/4 cup Icing Sugar
- 1/2 tsp water
Instructions
- Prepare a baking tray or plate with saran wrap or a silicon mat to put your cake pops in the freezer on.
- Tear Twinkies into hunks and toss in the mixer. Mix at low/medium speed until they come together.
- Pick up around 2 tablespoons of mix and press it into a ball. Insert a stick, and place on the tray. Repeat for the rest of the mixture. You should get 5 cake pops.
- Cut your candy in half and shape into bunny ears. Insert the ears into the cake pops.
- Place the cake pops in the freezer for about an hour.
- In a mug or bowl, microwave the chocolate chips and oil for 30 seconds and then stir. Repeat microwaving the chocolate at 30 sencond intervals, stiring each time in between until smooth. Add food coloring now if desired.
- When your chocolate is ready, remove the pops from the freezer and coat with the chocolate. Gently tap the dipped cake pops on the side of the bowl to remove access chocolate.
- Place the coated cake pops in a tall cup or mug to harden. Careful! Make sure the weight is evenly distributed, or they could fall over.
- Once the chocolate it hardened, mix your icing sugar and water to use to decorate your bunnies with a nose, eyes and ears if desired.
- Enjoy and please share!


Velvet Mcomber
I wanted to thank you for this good read!! I certainly enjoyed every bit of it. I have got you book marked to check out new stuff you post…
Alicia
Sounds great! Thank you ❤