Christmas Holly and Berries Free Crochet Pattern
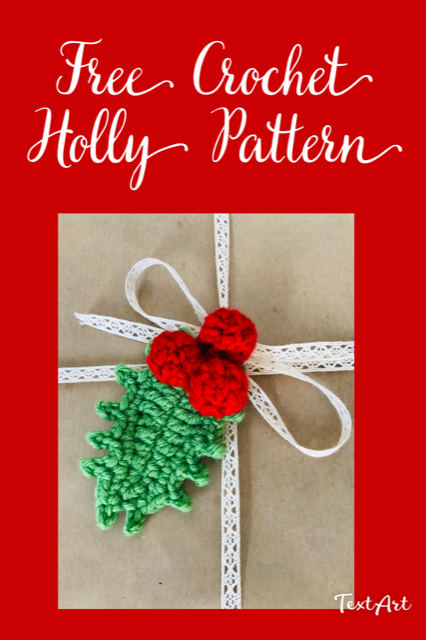
Simple brown wrapping paper, ribbons, and some of this sweet crochet holly could make some of the most beautiful gifts you wrap this year.
These are so quick and easy to make, but add so much charm and warmth to your gift wrapping! Classic reds and greens. Bright red holly berries and deep, bold green leaves pop out of the winter landscapes and off the brown wrapping just as well.

I made them a decent size as I thought really small berries and holly might look a bit odd on a larger present. The berries are approximately 3/4″-1″ and the leaf is around 3.5″ long.
It fit perfectly onto a 12″ x 15″ box.
I love how a vintage lacey ribbon compliments it.

Materials:
- Bernat Premium in Green – medium 4
- Bernat Premium in Red – medium 4
- 3.5mm hook, or larger per your comfort
Gauge: Not important for this project. I use a 3.5mm hook because my tension is naturally a bit on the looser side, so I use a smaller hook to tighten up my stitches.
Making the Holly Berries
With red, make a magic circle.
Don’t know how? Check out my picture tutorial. It’s SO simple and you’ll use it all the time!
Round 1: Ch2. Make 8 dc in the circle. Join with a slst. (8sts)
Round 2: Ch2. Dc2tog – 4 times. Join. (4sts)
Tie off. Sew up end.

Making the Holly Leaf
With Green. Ch.13
Round 1: Sc into the second ch from the hook. Sc1. Hdc2. Dc2. Tc3. Dc1. Hdc1. Sc4 in the last stitch.
Now working back down the opposite side of the chain…
Sc1. Hdc1. Dc1. Tc3. Dc2. Hdc2. Sc1. 2Sc in the last stitch. Join with a slst to the first sc of the round.
Round 2: *Ch3. Slip stitch into the second ch from the hook and the next st as well. Sc1 into the sc you started in. Sc1 in each of the next 2sts.* Repeat * to* 5 more times. Sc3. Repeat * to * 6 more times. Ch3. Slip stitch into the second ch from the hook and the next st. Slip stitch to the first stitch of the round to finish.
Tie off.
Weave in ends. Position and sew on your berries.

I hope you love these beautiful handmade embellishment for your gifts, pillows, blankets, where ever creativity brings you.
Please share this post with your crochet friends so they can enjoy this free pattern as well.
Subscribe so you don’t miss any awesome crochet, kids crafts or random family goodness.
And join the Cute Little Crochet Facebook group!
We’d love to see what YOU’RE working on. I love seeing all the projects and inspiration from my fellow crocheters. I know you will too.
CUTE LITTLE CROCHET FACEBOOK GROUP
Merry Christmas from Cute Little Crochet and Family! 💛


