Super Easy, Super Fun, Knotted Bunny Ears Headband
I’m all about quick, fun and easy projects; most of the time. These bunny ears are just that.
Bunny ears aside though, this knotted headband would be lovely on its own in any color!
Want the PDF so you never lose it? Download it for one dollar by clicking the link below. Or check out the Dollar Downloads page. Most of the patterns there can be found on this site for free.

You can use whatever worsted 4 weight yarn you have. I’ve tended to end up with a lot of Bernat yarns over the years. Their Premium yarn line is soft and affordable.
You can use a 3 weight yarn, but the ears will turn out a little smaller of course.

This is a great beginner project. You only need to know the single crochet (sc) stitch. You’ll get some practice making single crochet increases (2sc in the same st), and decreases (sc2tog), along the way.
The headband itself is nice and stretchy which makes it very comfortable.
Measurements and instructions for all sizes are provided. Sizes included are preemie, newborn, 3-6 months, 6-12 months, toddler, child, teen/small adult, and large adult.
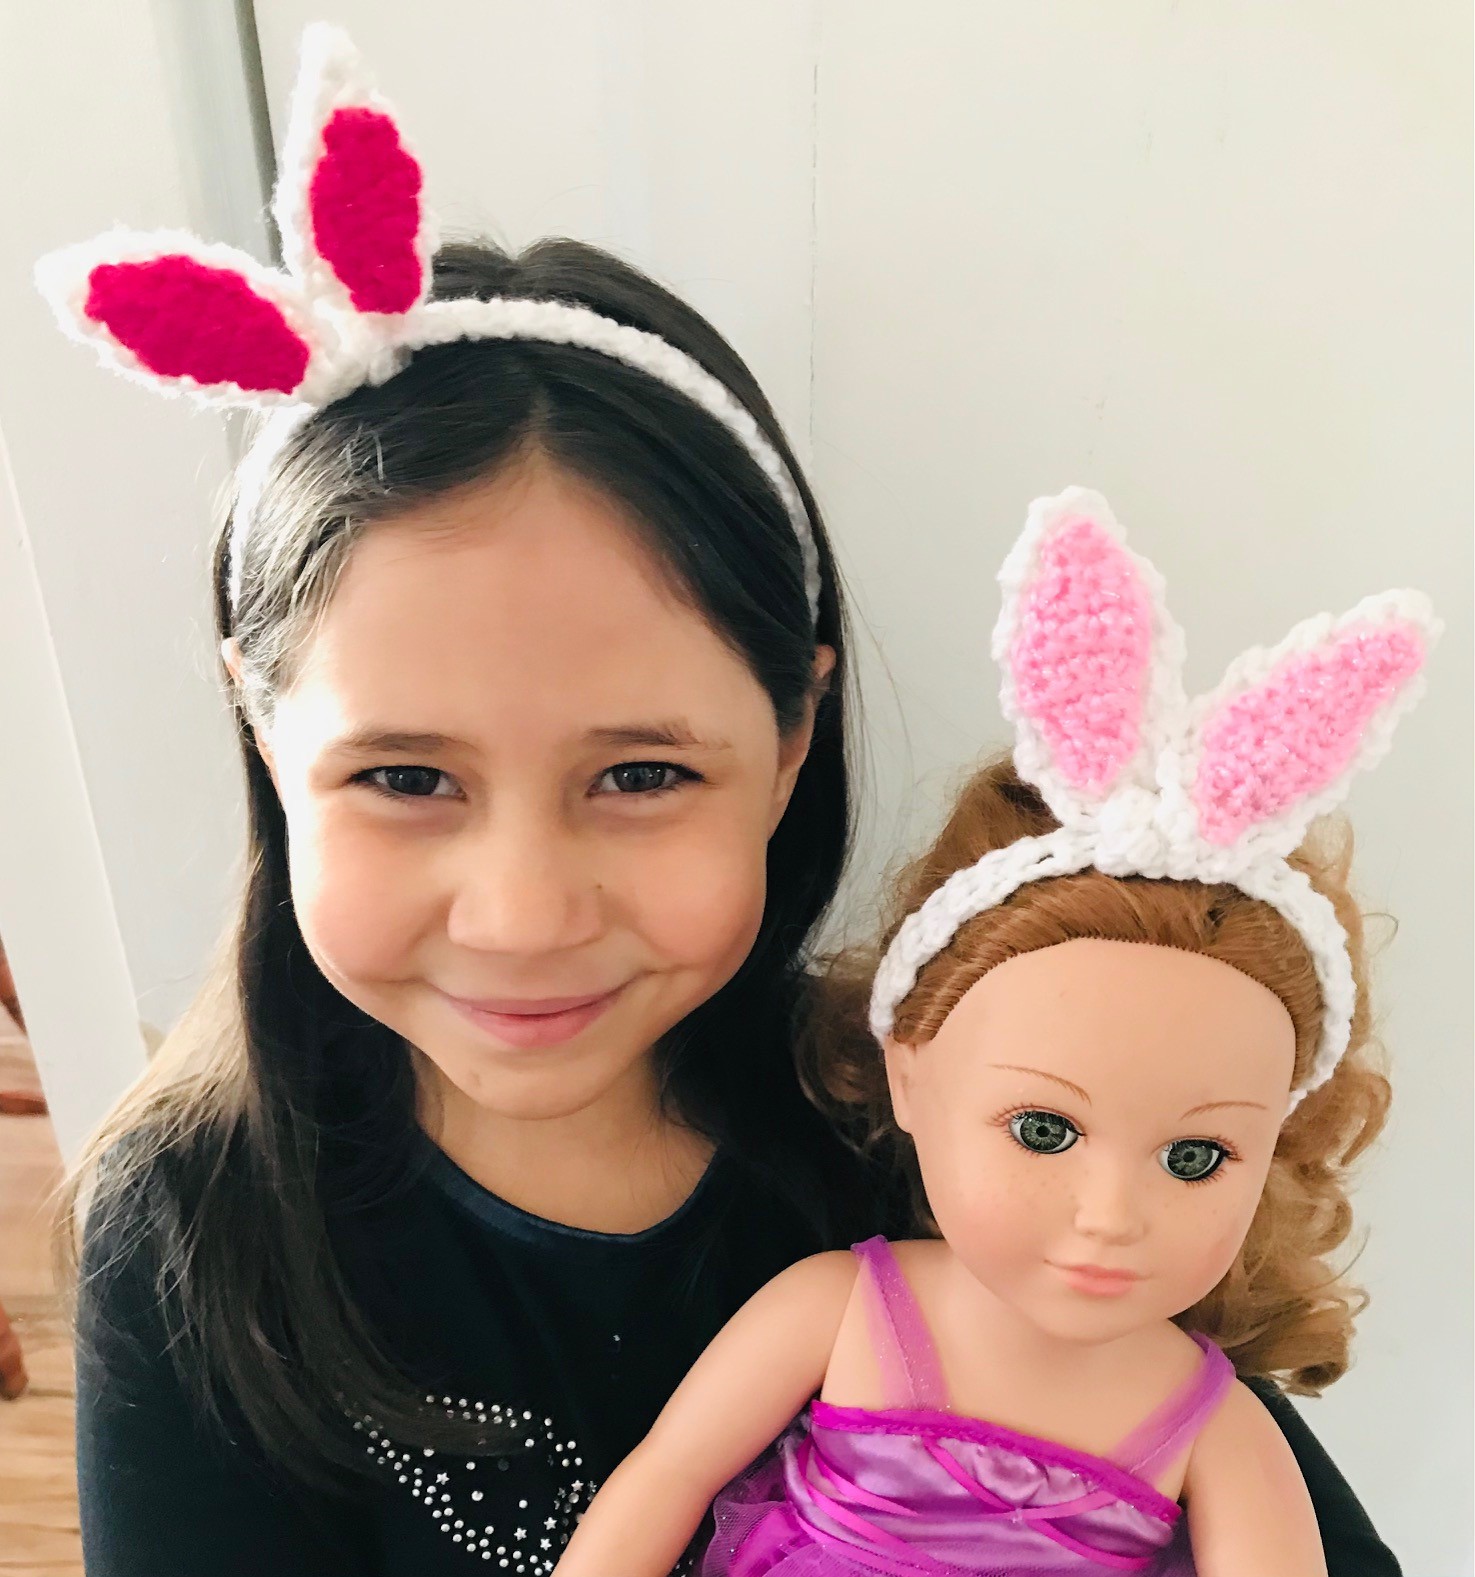
The newborn size fits nicely on a Journey Girl Doll, or My Life Doll. The preemie size may fit smaller dollies as well.

This is also a great project to use up some color scraps! We all have those sitting around don’t we.
Let’s make a super quick easy headband!

Materials you’ll need are:
- Bernat Worsted 4 Weight Yarn in white or color of choice for the headband
- Bernat Worsted 4 weight Yarn in pink or another color of choice for the inner ears
- 5mm crochet hook
- Darning needle
Stitch abbreviations:
Ch = Chain
Sc = Single crochet
Sc2tog = Single Crochet 2 together
2Sc = make 2 sc in the next stitch
St/ Sts = Stitch, Stitches
With your 5mm hook and white, or yarn of choice for the head band.
Ch2.
Row 1 – 2Sc into the first ch. (2sts)
Row 2 – Ch1. Turn. 2sc in the first st. Sc1 in the next. (3sts)
Row 3 – Ch1. Turn. 2sc in the first st. Sc1 in the next 2sts. (4sts)
Row 4 – Ch1. Turn. 2sc in the first st. Sc1 in the next 3sts. (5sts)
Rows 5 – 9 – Ch1. Turn. Sc1 in each st across. (5sts)
Row 10 – Ch1. Turn. Sc2tog. Sc1 in each of the next 3sts. (4sts)
Row 11 – Ch1. Turn. Sc2tog. Sc1 in each of the next 2sts. (3sts)
Row 12 – Ch1. Turn. SC2tog. Sc1 in the next st. (2sts)
Row 13 – Ch1. Turn. Sc1 in each of the next 2sts. (2sts)
Repeat row 13 until you reach the required measurements for the size you are making using the recommendation below.
Only measure the rows of 2sc. So, start measuring at Row 13.
Preemie – 9”
Newborn or Journey/My Life Doll – 11”
3-6 Months – 13”
6-12 Months – 15”
Toddler – 17”
Child 3-10 – 19”
Teen- Small Adult – 20”
Adult Large – 22”
Once you’ve reached the suggested length continue with the following pattern to create the other bunny ear.
Row 1 – Ch1. Turn. Sc2 in the first st. Sc1 in the next. (3sts)
Row 2 – Ch1. Turn. Sc2 in the first st. Sc1 in each of the next 2sts. (4sts)
Row 3 – Ch1. Turn. Sc2 in the first st. Sc1 in each of the next 3sts. (5sts)
Rows 4- 8 – Ch1. Turn. Sc1 in each st across. (5sts)
Row 9 – Ch1. Turn. Sc2tog. Sc1 in each of the next 3sts. (4sts)
Row 10 – Ch1. Turn. Sc2tog. Sc1 in each of the next 2sts. (3sts)
Row 11 – Ch1. Turn. Sc2tog. Sc1 in the next st. (2sts)
Row 12 – Ch1. Turn Sc2tog.
Tie off. Weave in ends.
Now all you have to do, is knot it just under the ears to create the headband! I just use a basic knot. Like the one you use when tying your shoes.
Inner Ears – Make 2
With your 5mm hook, and pink or whatever color you have chosen for your inner ear.
Ch.2
Row 1 – 2Sc in the first ch. (2sts)
Row 2 – Ch1. Turn. 2sc in the first st. Sc1 in the next st. (3sts)
Row 3 & 4 – Ch1. Turn. Sc1 in each st across. (3sts)
Row 5 – Ch1. Turn. Sc2tog. Sc1. (2sts)
Rows 6 – 8 – Ch1. Turn. Sc1 in each of the next 2sts. (2sts)
Tie off, sew on.
To make the ears stand up straighter and closer together, sew them together at the base of the ears.

You’re finished! I hope you enjoyed this project.
Please share or leave a comment. And SUBSCRIBE so you never miss new fun from Cute Little Crochet and Family.


